RobotFrameWork(十一)AutoItLibrary测试库在win7(64bit)停安装及简单使用
日期:2014-05-20 浏览次数:21395 次
最近安装AutoItLibrary,发现在win7 x64下无法安装成功,后来经过定位,发现是3rdPartyTools\AutoIt目录下面AutoItX3.dll的问题。因为AutoItX3.dll是32位的,所以我就在网上搜索了一个64位的dll去替代。再次安装就没有问题了。
针对AutoItLibrary,我进行以下3个修改:
1. AutoItX3.dll替换为64位的,使其支持win7 x64
2. 修改AutoItLibrary自带用例,支持win7中文环境运行
3. 使用robotframework本身的ScreenshotLibrary 取代AutoItLibrary中截图
一、安装
1. 安装python2.7和robotframework,参考http://blog.csdn.net/mengfanbo123/article/details/8450760
2. 安装python对windows的扩展pywin32-218.win-amd64-py2.7.exe,下载地址:http://download.csdn.net/detail/liuheng123456/6235457
3. 安装Pillow,以便使用ScreenshotLibrary ,下载地址:http://download.csdn.net/detail/liuheng123456/6235465
4. 安装AutoItLibrary,下载地址:http://download.csdn.net/detail/liuheng123456/6236097
①解压压缩包后,在dos命令下,进入到解压的AutoItLibrary目录;
②执行python setup.py install
5. 安装检查
①在创建一个测试套(suite),并在Setting中导入AutoItLibrary和Screenshot
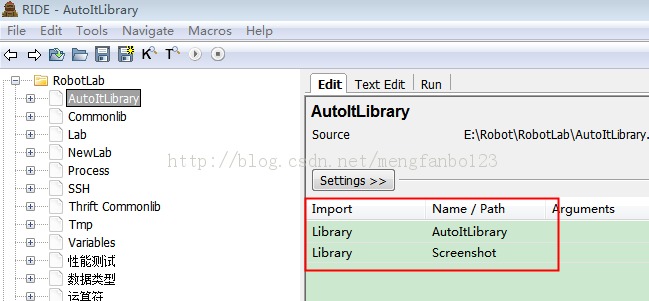
②按F5,可以看到AutoItLibrary和Screenshot,表明安装成功

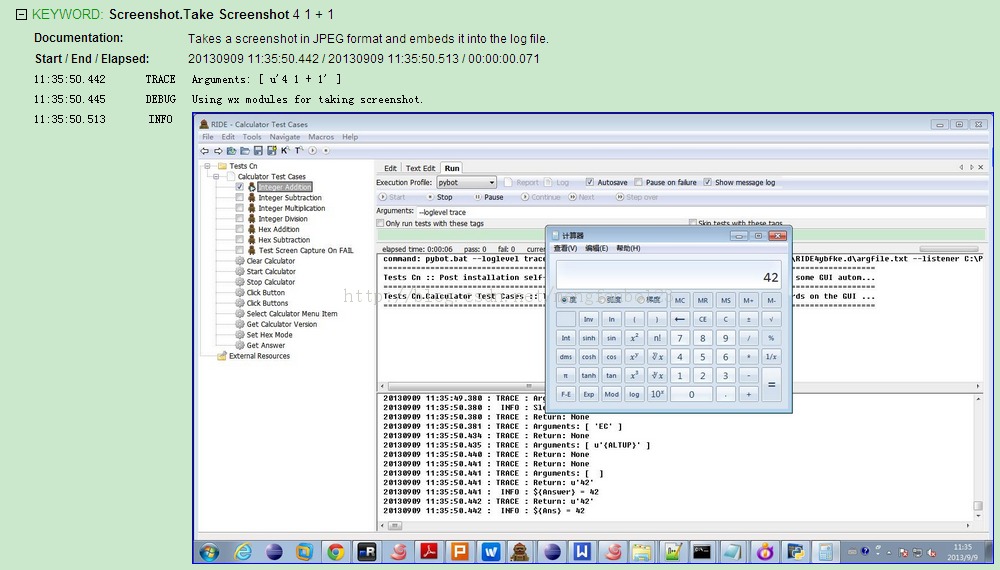
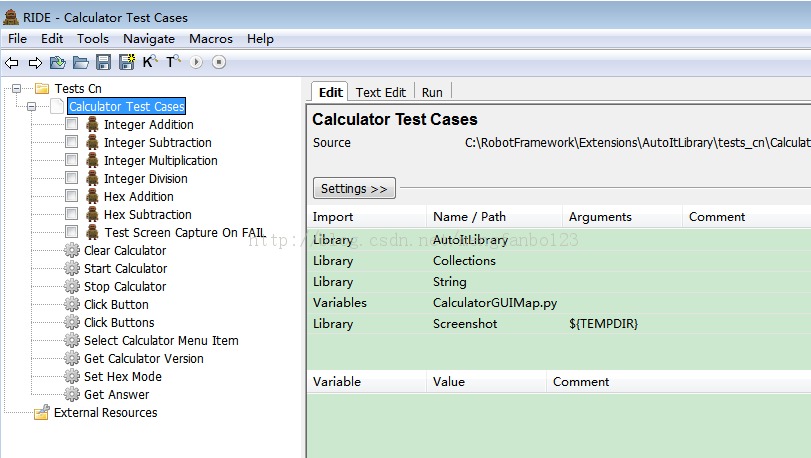
二、AutoItLibrary自带计算器用例运行
AutoItLibrary安装完成后,会在C盘下生成C:\RobotFramework文件夹,用例就在C:\RobotFramework\Extensions\AutoItLibrary下面。
①进入C:\RobotFramework\Extensions\AutoItLibrary\,你会看到有test_cn和test_en两个文件夹,test_cn是可以运行在win7中文环境下的,test_en则是英文环境。
②进入test_cn,双击RobotIDE.bat,然后运行用例就ok了。
③运行完用例,查看log.html,可以看到Screenshot截图