Photoshop打造破碎玻璃文字
日期:2013-05-10 浏览次数:21080 次
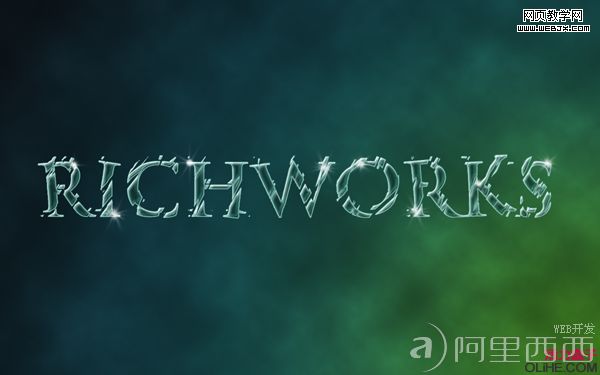
在本教程中,我们将创建一个了不起的破碎玻璃文字效果。我们将在本教程学习到很多关于混合模式和图层样式的效果。实际上,实现玻璃文字效果我们将尝试使用大量的图层样式,这样能得到比较真实的效果。
步骤1
打开Photoshop,创建一个尺寸为1280 * 800像素的新文件。我们需要给背景一个很好的渐变,使用渐变工具(G),围绕文件的右下角应用径向渐变。我用的颜色组合为#2e5b15 – #103533 – #090e13。
Open Photoshop and create a new file with dimensions 1280 x 800 px. We need to give a nice background gradient, so grab the gradient tool(G) and apply a radial gradient centered around bottom right of the document. The color combinations I used are #2e5b15 —- #103533 —- #090e13.

步骤2
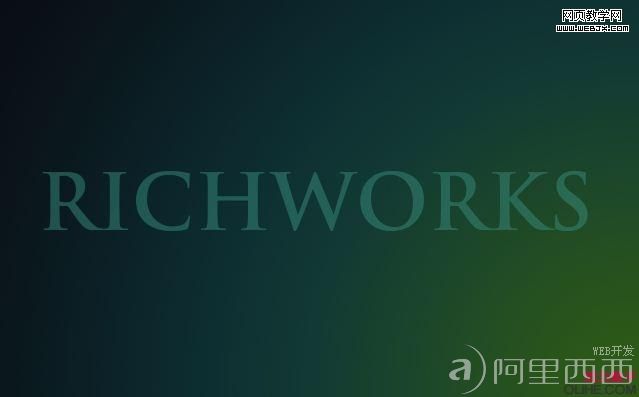
现在使用文字工具(T)输入你选择的任何文字,我使用’Trajan Pro’字体输入了RICHWORKS,这是我最喜欢的字体之一,它能很好的适应很多文字效果。我使用了粗体的文本样式,颜色设置为#41a993,不要忘记改变图层面板上填充的不透明度为50%,这样做是为了获取文本的初始透明度。此外,更改填充的透明度不影响图层样式的外观。
Now, using the TEXT TOOL (T), type any word of your choice. I typed RICHWORKS using the font ‘Trajan Pro’ . This infact, is one of my favorite font and adapts well to a lot of text effects. I used a bold font style with the text color set to #41a993. Don’t forget to change the Fill opacity in the layers palette to 50%, this is done to get the initial transparency to the text. Also, changing the Fill opacity does not affect the appearance of the Layer styles.
步骤3
在图层面板中栅格化文字层,在文字层上双击打开图层样式窗口。现在要做一系列尝试,经过设置不同的值,我终于决定要使用以下设置。按下图应用图层样式。
Rasterize the Text layer in the Layers palette and double click on the text layer to open the layer styles window. Now, it is all about experimenting. After doing some meddling with the values, I finally decided to stick to the following settings. Apply the layer styles as shown below.
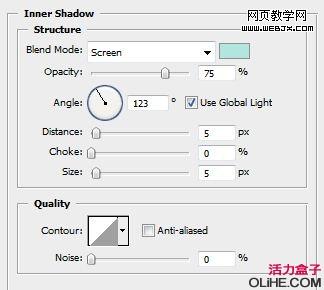
内阴影-颜色#aee8dc
INNER SHADOW — color #aee8dc
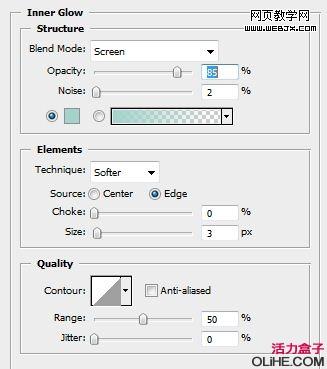
 内发光-颜色#9ed3c9
INNER GLOW — color #9ed3c9
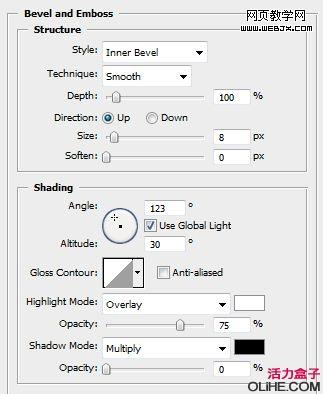
 斜面与浮雕
斜面与浮雕
BEVEL & EMBOSS
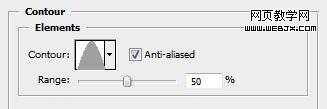
等高线
CONTOUR
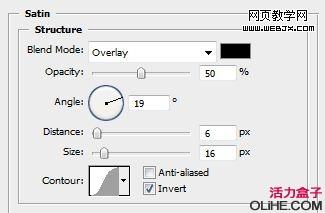
光泽
SATIN
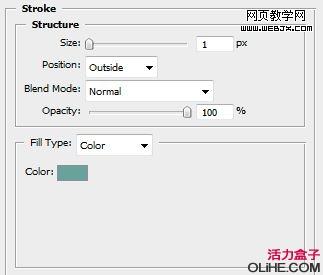
描边-#65a49b
STROKE — #65a49b
步骤4
现在,玻璃效果完成了。分别在每一图层风格上尝试改变透明度获得满意的效果。最终图像应类似于下图:
Now, the glass effect is ready. Try experimenting with the transparency of each layer style individually to get the d
